I’d like to offer some advice about cleaning a bicycle, after
hearing some disturbing stories from some customers, friends and family (you
know who you are). I admit that I am more finicky than most and tend to wipe
down most traces of dirt and sweat from my bike daily, or at least every few
days, if I’m too exhausted from the ride I’ve just finished, but most cyclists
recognize the eventual need to clean their ride, not only to make it look
better, but also to make it operate more efficiently.
I would first like to point out that, although modern bicycles have
frames of carbon fiber and exotic materials, the machines are still primarily
made up of moving metal parts, and introducing water to them is not the best
idea. Even if you haven’t experienced a chain completely seized up with rust,
there are many other important parts of a bicycle that will eventually become
victim to oxidation, such as the headset and bottom bracket. The tiny metal
ball bearings involved need to be clean and well lubricated in order to move
freely and keep your bike operating smoothly.
If you have a bicycle that was manufactured in the past 10-15 years, you
may be fortunate to have sealed bearings that keep out moisture very well, but
that doesn’t mean you should take a power washer to the bike! As a matter of
fact, spraying a garden hose to your bicycle is really just a bit lazy, when
taking the time to wipe it down with a damp cloth or two is really all you
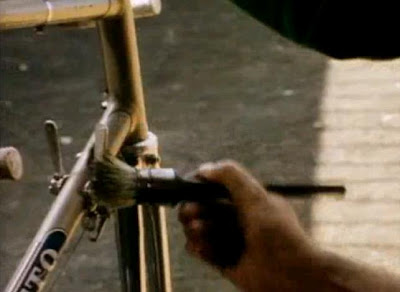
need. What I like to do (I learned this
technique in an old Paris-Roubaix cycling video) is first go over the bicycle
with a wide soft bristle paint brush, dusting off the frame and wheels. A
smaller tip brush is good for some of the harder to reach spots, particularly
around the bottom bracket, where the chainring/crank assembly and derailleur
are in the way.
I then use a damp cloth, or perhaps one with a spray of degreaser
(Simple Green is my favorite) for stubborn spots, like bug bodies or asphalt
splash under the down tube. Some compulsive folks actually wax and buff their
frames, but I’ve never done this, and I’ve had frames for twenty years which
had a finish looking close to factory new! Maybe if you live in extreme
environments, waxing your frame would be something to consider, but I’m not
sure what the average cyclists would get out of this but a lot of aggravation.
Perhaps most important part of your bicycle cleaning would be the chain
and drive. Put a little degreaser on a rag and gently pinch the pulleys on the
rear derailleur as you SLOWLY pedal the bike. The idea here is to remove
accumulated gunk from the pulley without mangling your fingers or getting the loose
end of the rag caught in the chain and pulleys or rear cogs. Similarly, wipe
down the chainrings, moving the chain from ring to ring as you clean them. As
an alternative, you could spray on some degreaser and scrub the pulleys and
rings with an old toothbrush. I recommend holding a rag in your free hand,
behind the pulleys and rings as you spray and scrub to prevent making a greasy
mess everywhere.
If you need to clean out the rear cassette, you may want to remove the wheel, again to prevent making a mess over any part of the bike you may have
cleaned previously. Learning to remove the cassette from the wheel for cleaning
is really not that difficult, but not absolutely necessary. Park Tool makes a
great combination stiff brush with a serrated hook (pictured below left) for getting
debris out from between the cogs, but any long bristled brush and a long, thin
pick-type tool will work.
Although I have one of those fancy clip-on chain cleaning tools
(pictured above right), I have yet to try it - I’m not really sure why, but perhaps I
just find the technique I’ve used in the past so simple. Again, holding a rag
behind my working area to prevent splattering everywhere, I spray degreaser on
a length across the top of the chain and scrub the surfaces to loosen the grime.
Holding the crank with my opposite hand to create tension on the chain, I then
pull backward with the chain wrapped inside the rag to wipe everything clean. Those
of you who have neglected this chore for a while may have to let things soak a
bit or go over the area more than once. You will have to rotate the pedals to
expose different dirty sections of chain to complete the job. When finished, be
sure to apply a light bicycle chain oil (a small drop on each link will do) to
help protect the chain by keeping out moisture and to allow the links to move
freely and operate quietly.
As a final note, if you ride in the rain fairly frequently and don’t
have a bicycle with a sealed bottom bracket, it is extremely important to
either have your bike professionally maintained or learn to do so yourself.
Water sprays up from your back tire and works down the seat tube into the
bottom bracket. I found out the results when I took apart my brother’s bicycle
during my mechanics class and found the bearings inside to be bone dry – NOT
the smoothest of operating conditions for any bike, the bracket desperately
needed to be repacked with grease. I was lucky to have caught it relatively
early and didn’t have to replace a bunch of bearings with flat spots or worse, a couple of grooved bearing cups($$)!


