 A few weekends ago I was struggling with a couple customers, one of which was very reasonable and appreciative, and one who was not!
I received a phone call from a gentleman who, while pedaling on a bike
path in Rehoboth, Delaware, had been t-boned by a
teenager who was looking at his cell phone while riding his bicycle! The front
wheel of Jeremy’s mountain bike was severely bent – “taco-ed” as some folks say – and the rear derailleur was twisted into the spokes.
He was not shocked to hear that the front wheel would have to be replaced,
as it was FAR beyond any truing that would help the situation, but he was very
disappointed to hear that the whole bike might be shot, as I noticed the
derailleur hanger was badly bent, and because it was part of the aluminum frame (not a bolted-on version that could possibly be swapped out), would be in risk of snapping off if I attempted to muscle it back into alignment.
Granted, this was a sporting goods store purchase and not
super-expensive model of bike, but no one wants to just throw hundreds of dollars around. I suggested to Jeremy that he come down to my shop to at least give bending the hanger a shot, as he would be having to replace the frame otherwise.

If you aren’t familiar with how the hangar alignment tool (above) works, you remove the derailleur from the bike and screw in the tool. The adjustable pin gauge on the other end is used to check if the hanger is in parallel by observing the pin position when touched against the top, bottom and sides of the wheel’s rim. The tool is then used to gently pry the hanger into alignment, followed by more checking with the pin gauge.
We were surprised and relieved when I was able to finesse the hanger back into a reasonable position without snapping it off. The derailleur cage itself
was bent a bit, but the Shimano Tourney part is made of a comparatively flimsy
pressed metal, so a little nudge here and there straightened out that problem.
Jeremy’s timing really couldn’t have been better, as far as the front wheel was concerned. I had recently purchased a secondhand bicycle for my
future daughter-in-law, who does not know how to ride a bike, but is excited by
the prospect of learning the skill. Anyway, that bike had a bolt-on front
wheel, and I was interested in getting one with a quick release skewer, in order to make
transporting the bike inside a car easier. Jeremy’s taco-ed wheel was the bolt-on
type, so I suggested a swap (of sorts) where he would purchase the appropriate
wheel for Pam’s bike, and he could take the one currently on hers.
At that point Jeremy was so excited with the prospect of having his bike
back in working condition, he may have agreed to any price, but he was
happy to hear that I could get a good deal on eBay. Considering he might have
had to shell out the money for a whole new bike, he was very appreciative to me
when wheeling his bike out of my shop later that afternoon.
On the flip side, someone explained in email messages that he was having
shifting issues due to a bent large chainring and/or a worn-out cassette. In
retrospect, the customer knew just enough about bikes to be dangerous and had what
he thought were the parts needed for replacement. I should have known this was
not going to go well, when he arrived with a modern through-axle crankset, which requires external bearing bottom bracket cups, and the one currently on the bike had an older Shimano Octalink crankset with a cartridge bottom bracket.
With replacement of the cranks ruled out as a remedy to his problems, I immediately
suggested we remove the chainring and see if there was any way to straighten it
out. I noticed that the ring, despite being relatively new, had a few teeth chipped off. I easily removed three of the five chainring bolts, but the other two were seized. There are slots in the back side of the nuts into which a tool can be inserted to provide some resistance in the opposite direction, but I couldn’t get a solid grip, and the bolts kept spinning together, not loosening, when I turned them.
When I asked if he could leave the bike overnight, so that could spray on some penetrating solvent and/or look into some other possible fixes, he told me that he really wanted to get in a ride the next day. “I will do my best to have everything done by tomorrow morning,” I told him.
A couple hours later I was able to remove the last two bolts by putting a hex key in my vise, turning the crankset upside-down onto the key and, while pressing down with the tool into the back of the nut, rotating everything together. The steel top of my workbench is perfectly flat, and when I laid down the chainring, I could see that several of the bolt tabs on the ring were bent in different directions – getting this thing straightened was going to be nearly impossible.
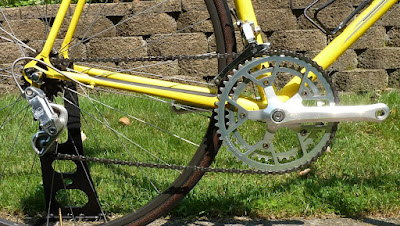
I did try for a little while, but this was a lower-level quality product made of pressed steel and was fairly flimsy. Every time I pushed or pulled in one direction, I ended up knocking the rest out of alignment. On the pegboard wall behind my work space, I hang used chainrings just for decoration. I happened to have a slightly used FSA chainring with the correct bolt center diameter and thought it would work perfectly fine. It was of a much higher quality, and if he didn’t like the looks (black vs. his gray-finished cranks), it would at least get him on his way the next day, and we could swap in a new one later.
It was marked up as a “10-speed” chainring, but a lot of that is just marketing – the difference in 8-speed (his system) rings and 10 is very small. Problems can sometimes occur with different chain size: a wider 8-speed chain on a 10-speed crankset can rub on the back of the large ring when in the small, and a narrower 10-speed chain can slip between rings when shifting on an 8-speed crankset.
However, we were using the original 8-speed chain on an 8-speed crankset, so there should be no issues with rubbing. A small adjustment might have to be made to the (outer) limiting screw to keep the front derailleur from throwing the chain, but that would be it. Again, this wasn’t intended to be a permanent fix anyway!
Washington Street is slightly uphill, and I immediately questioned why the customer was trying to shift the front derailleur while grinding away on the pedals. “Oh, I do it all the time”, was his response, and I kept the idea that this could be what caused the mangling of his chainring to myself. He said the shifting was not working properly and was a bit noisy, so I asked if I could try it myself.
Recognizing that this was not the right terrain for big ring cycling, I turned left, downhill and easily shifted out of the big ring until I could get some speed, then easily shifted back up and the bike and I quietly moved down the block. I returned, and trying my best not to sound smug, told him it worked perfectly for me.
I explained that 40 years of riding bikes with gears has taught me that, because the front derailleur is located behind the chainrings, applying hard pressure to the pedals when trying to shift tends to pull the chain down and towards the bike, causing it to drop off. “You have to kinda back off the force you are applying and just pedal a soft circle until the shift is made.” The noise he was hearing was probably the alignment of the derailleur being messed up temporarily by the chain rubbing hard on it, because he was shifting under load.
He told me that he always shifts while pedaling, and I explained that if he was riding on the trail, which is flat, that it isn’t as much of a problem. “You are probably already moving at a good speed, and not putting as much pressure on the pedals.” I told him that my goal was to have the bike working so that he could do his ride the next day, and we could always swap out parts later.
I charged him my regular, super-cheap rate and gave him the chainring for free, just because he was going away with a bit of an attitude. Little did I know that a few days later, when I was down at the shore, that I was going to receive a succession of emails telling me how unsatisfied this guy was about the repairs.
He kept mentioning the same idea about shifting and the noise and then complained about the condition of the chainring I gave him, which was just ridiculous. First of all, he saw it in person when I gave him the bike, so any aesthetic complaint should have been made then. Secondly, the ring I gave him was of a higher quality, with no broken teeth and no bends, so it was much better than the one with which he was riding!
I laid out all of the information I know about shifting and the respective parts involved, listed all of the work I did – the difficult removal of his chainring, the attempt to straighten the part, the swapping of his cassette, adjusting the shifting – and repeated that the supplying of the chainring was to allow him to take the next-day ride that seemed so important to him. I received a message that insinuated that I didn’t know what I was doing, and that he asked “somebody on the trail” who agreed with him about the shifting and didn’t know why I would install a worn-out chainring.
I put an end to the conversation by
stating that if he thinks he can find a shop where - the day you show up
- the mechanics will swap out a cassette and have a viable (FREE) chainring installed so you can be on your way for the ridiculously small amount you paid, please tell me exactly where that place is, because I will tell all of my customers to go there instead!
When I returned from the shore, we found that my new friend had removed the chainring and left it hanging on the doorknob of my side entry.
I certainly don’t want to make a habit of badmouthing unreasonable
customers, but mind you, I didn’t use any names, and if just a few future
clients think, “Man, I am never going to act like that!”, then I’ll feel
perfectly fine that I did share the story.
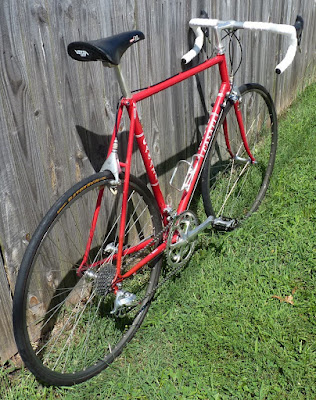
I’ll say goodbye with some photos of the Casati Monza that I set up for a customer. It’s a bit of a blend of old and new(er), but you really can’t go wrong with polished aluminum parts on a vintage steel frame!


