I mentioned to a recent customer how I really enjoy the building and selling of vintage bicycles, but the repair/tune-up side of my business is far more consistent. It is not always the case when I want a repair to be interesting, because that often means I am running into some kind of complication, but occasionally I learn something new and useful for future projects.
In this case someone brought me an inexpensive BMX bike that had gyro brakes, that is, a mechanism that keeps the cables from being tangled when the handlebars are rotated 360 degrees. The bike had been stored somewhere damp and the cables rusted in the housings and were completely seized. I found an inexpensive new cable kit on eBay and was enthusiastic that I could pull off reassembling the brakes, even though it wasn't something I had performed previously.
The configuration (shown below) is made up of a top plate that is connected to the bars/steerer tube, just below the stem. This plate is where the housing for the right-hand brake lever is anchored and connected with cables to a middle plate. This plate is actually two pieces, joined by a flange, which rotate independently. The middle plate is also connected by cables to the lower plate, where housings are anchored to the head tube of the bicycle.
The two cables on each plate are necessary to keep even pressure on the round plate as the bars are rotated. These split cables come together at a covered mechanism cyclinder on each end - one going to the brake lever and one to the rear brake. In the photo below of the Y-cable section for the handlebar end, you'll note that one side of the split is a bit longer. This compensates for the shorter length of travel needed on the right side, over to the brake lever.
After studying all of the parts before disassembling the non-functioning brakes, putting it all back together wasn't too difficult. The real challenge was setting up the brakes, since there isn't a lot of travel in the plates up and down, which meant there wasn't much room for making corrections to the brake pressure. The rim had to be perfectly straight and the pads aligned properly on the rim's braking surface!
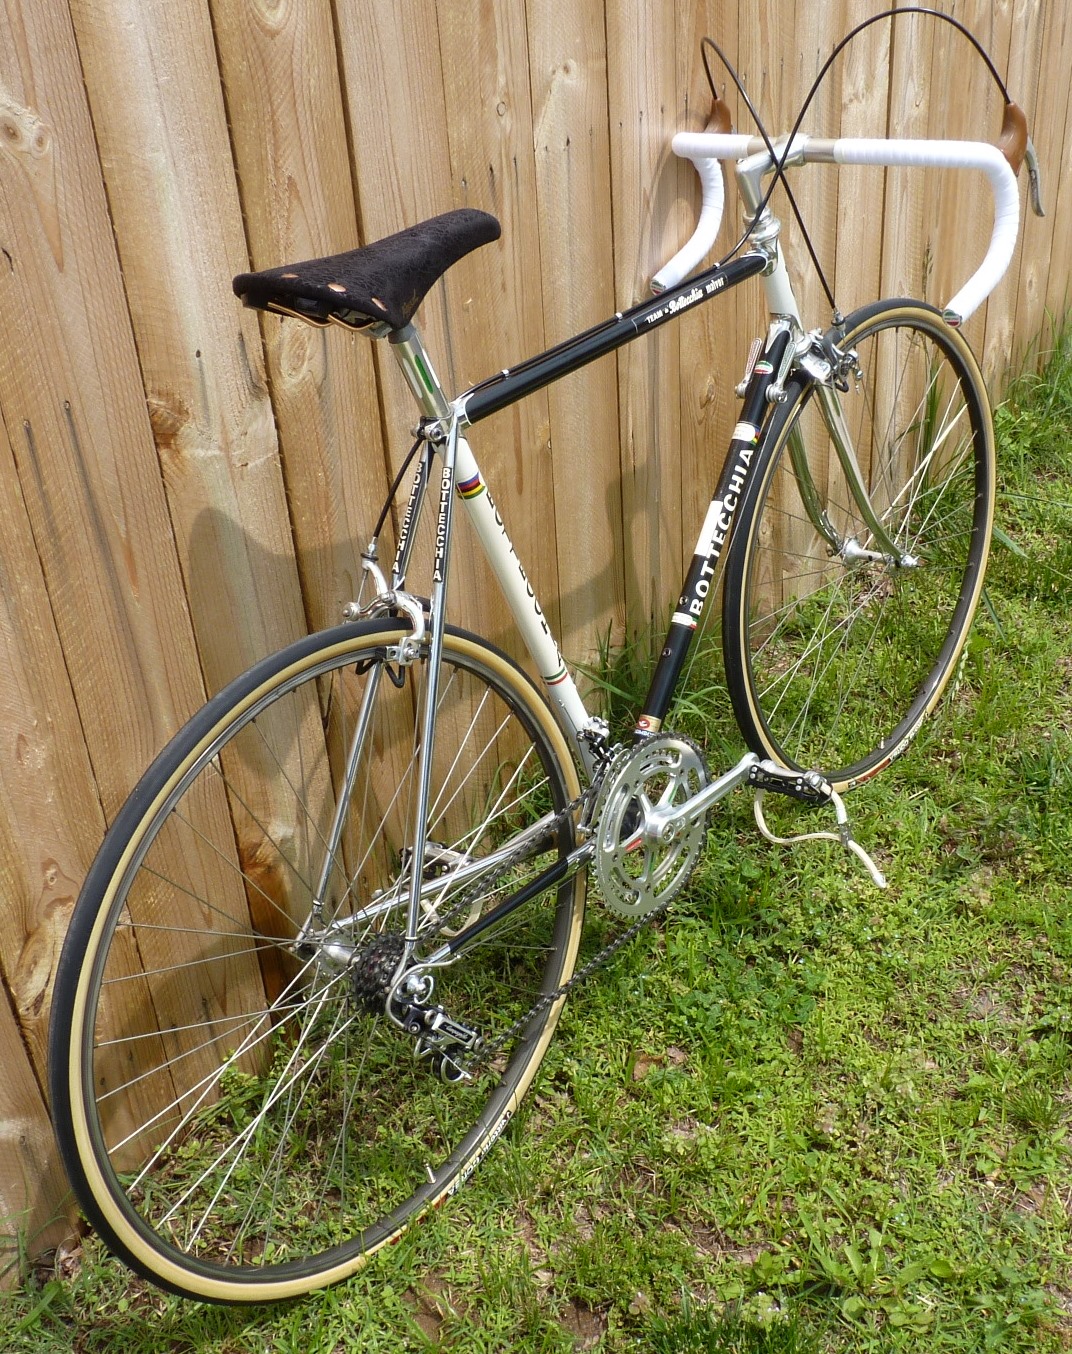
As promised in my last blog entry, here is a more in-depth collection of photos of Brendan's Malvor-Bottechia bicycle. Right now I have the bike parked below the huge
poster of Giuseppe Saronni that my buddy Ralph game me, as it looks incredibly similar, except with more white paint and chrome seat/chainstays. By the way, in keeping with the blog theme, this was my first experience with cloth bar tape, which is far less forgiving than cork tape! I was patient, and it turned out alright.
I'm sure you will agree that this is one of the most beautiful machines I have built:
Over the last few years, I have built some interesting bikes for another customer named Tom, who has learned (the hard way) about the myriad compatibility issues with custom builds. He had an old TREK 520 touring frame custom painted in a hue eerily similar to the "Congac" color of my first 10-speed, a Ross Grand Tour II from the early 1980s.
Tom's intent was to have fatter tires, and in order to clear the frame, he went with some 650mm wheels. The front wheel had a hub had a dynamo to power lights or charge small devices, so the wheels became the priority when we realized that no adapters could possibly lower the V-brakes to a position to provide enough braking power. The only solution was to have someone re-braze the brake mounts lower on the seat stays.
It was a shame to somewhat ruin the custom paint, but Tom had the affected area covered in black paint, and it blends in pretty well with the brown. Yet another new process for me came about when I hooked up a set of Problem Solvers "Travel Agents" to improve the cable travel from linear pull drop bar levers to V-brakes. Simply put, the contraption loops the cable around a pulley to provide the correct length of cable travel:
Tom collects some really nice parts for his bikes, as we outfitted the TREK with Velo Orange cranks, old-school pedals and stem, a Microshift Sword drivetrain and Shimano Deore brakes. The vintage Sakae Road Champion handlebars with the randonneur bend are a nice throwback touch.
My friend Johnathan stopped by a few weeks ago for a little "Bicycle University", as he performed a good portion of the work putting together his 1998 TREK 5500 OCLV carbon bicycle, with some minor instruction. He has watched me assemble a few bikes that make up his eclectic collection and has often lended a hand or two, so he has acquired some real wrenching skills! No, we are DEFINITELY not Lance Armstrong fans, but Johnathan works for the Postal Service, so this bike was the highlight of our work together.
He snapped a couple of photos for me to share before proudly loading it into his car:
Back in April, a potential customer inquired about the Colnago Export frameset I had featured in the queue of my
For Sale and Projects In Progress page. I explained that I had a few builds planned ahead of it, and that my repair/tune-up work would be a priority, but he mentioned it was a future birthday present for himself and that there was no rush.
I had all of the parts ready to go, so during a spell of bad weather days, I set to the assembly. After a few exchanges with Rich about his preferences, etc., the Colnago was completed, and we scheduled a pick up of the bike within the next couple of days.
The specs are Campagnolo Chorus 8-speed group, Cinelli bars and stem, Selle Italia X-1 saddle and a wheelset built with Regida CSB DP-18 rims, Campagnolo hubs and Vittoria Zaffiro Pro V tires (my new vintage-look tire of choice).