Tuesday, May 21, 2013

Signs, signs, everywhere signs

   I do have a few cycling-related signs decorating the shop, but they are either fairly small or fit well into narrow or short spaces.


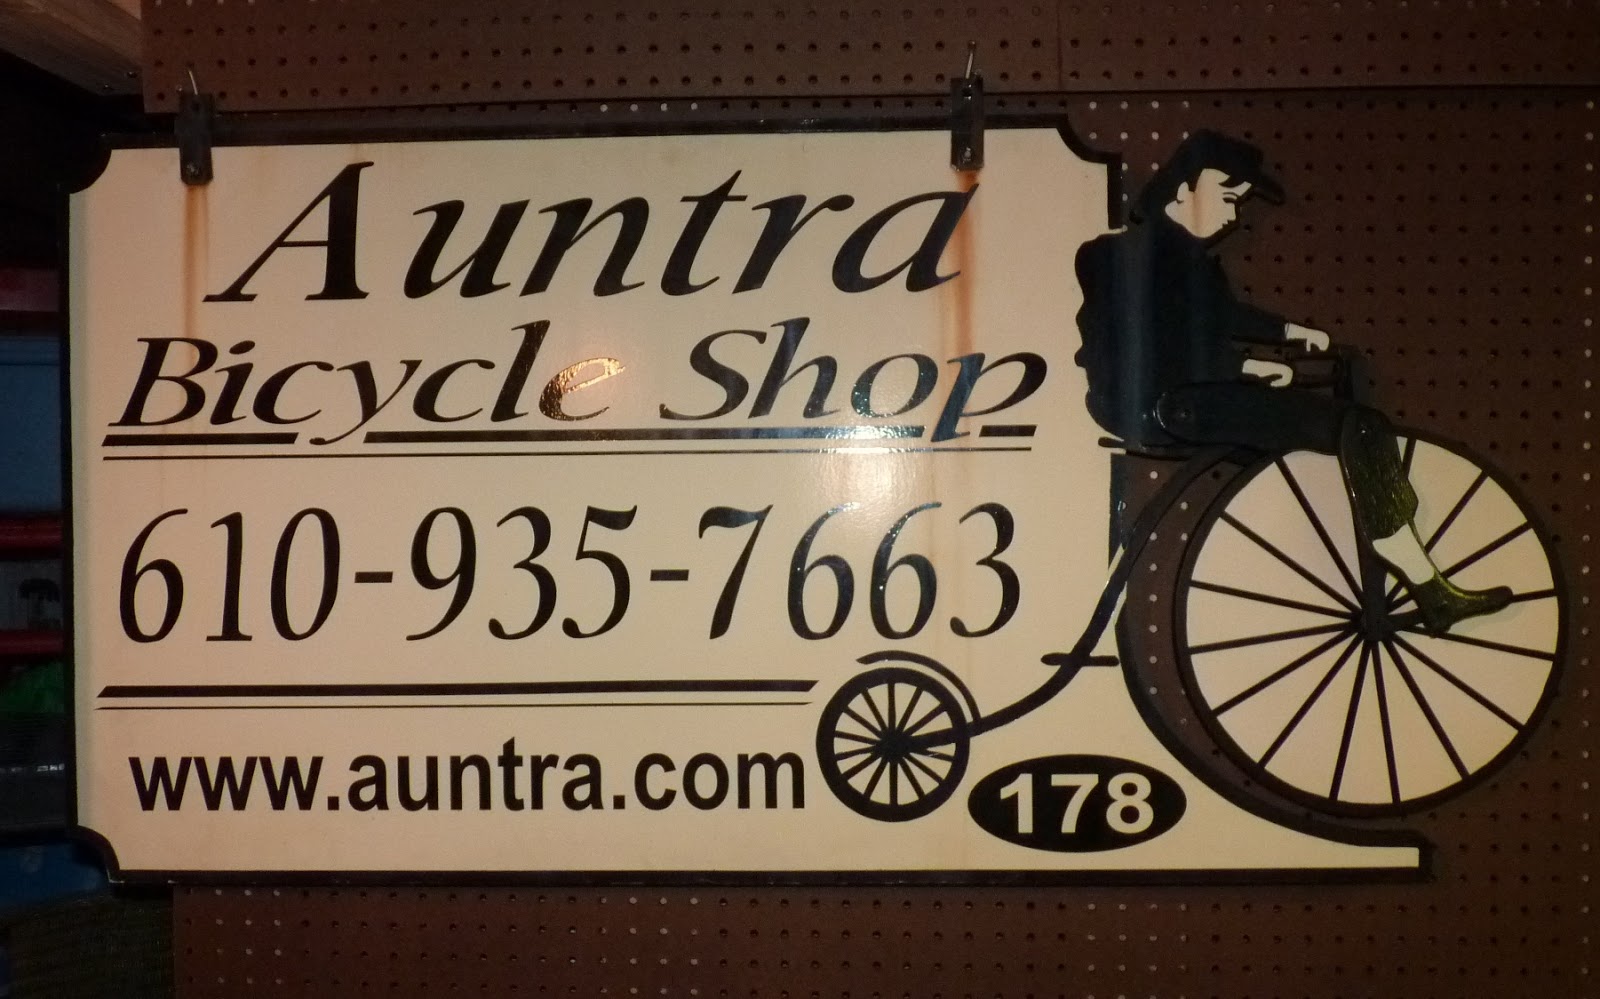
   I'm having a bit of difficulty finding the right area for the Auntra sign that I've completed, because it is pretty big, and needs to hang out from a wall in order for both legs to rotate freely (this is the "before" picture below).

 
   The first step in the repair process was to measure the opening for the wheel and cut a circle from 1/2" plywood in the appropriate size.  There was one leg piece that remained hanging from the sign when we claimed it, and I traced it onto some quality 1/4" plywood and cut it with a jigsaw.
 
 
   Matching the beige color was difficult because weathering had changed the original shade, and everything I tried looked too bright. I chose an eggnog color and very lightly sprayed some gray primer over that to "dirty it up" a bit - the end result was pretty close!
 
 
   I purchased a  bunch of nylon bolts and spacers of different lengths, as well as some washers. Here is the old leg, which needed a bit of touching up, and the back side of the new leg, showing a bit of the assembly.
 
 
   I had planned to paint the wheel spokes and tire, but I knew that the straight lines were going to be a challenge. I thought that a better method would be to use a wide tip Sharpie marker to draw the lines. While drawing I used a T-square, thankful that it featured raised edges to keep the ink from seeping under them and messing up my work. I found that my hand was still steady enough to paint the curve of the tire. As each side dried, I sprayed on a clear coat to protect the work.
 
 
   I had to come up with an idea for the pedal assembly - something rigid, but not too thick, or the hip pieces would flex out from the body and not rotate smoothly. I wish I could explain how popsicle sticks came to mind, but I can't. I drilled 1/4 holes at each end of the sticks, one for the dowel that would provide the pedal axle and one for the dowel that would go through the wheel.

  
   To create the fork, I glued and tacked a piece of 1/2" square dowel to both sides of the "head tube" on the bicycle sign. Previously I had tapered the bottom ends with a file and drilled a 9/32" hole in each to allow the wheel axle to rotate freely through them.
 
 
   Putting the whole thing together was tricky, and I realized that I couldn't just slide the dowel through everything, because I needed to secure the wheel to the dowel to make it turn when the pedals moved. Any glue put on the axle dowel beforehand would be spread through the washers and holes in the fork, and be stuck as well.
   I decided to split the axle in two halves, put the glue in the wheel hole and then push the two parts into the middle. To help stabilize the connection, I put a small pin in one end of the axle half, and test fit them before applying the glue. I touched up the exposed wood in the pedal area with black paint, and then fit the legs onto the sign.
 
 
   The sign is hung here temporarily, but it can't stay, since it would waste the storage space for pegboard hooks, etc. There is also a dartboard nearby, and I certainly wouldn't want to risk any stray shots!


Now if I could only find all the parts I need to finish the Atala bicycle!


Monday, May 13, 2013

Thread count?


   No I’m not selecting some quality sheets for my bed; thread count is an important detail I learned about while trying to find a Campagnolo freewheel for my Atala bicycle project. It turns out there are several different types of threading, particularly British, French and Italian, on older freewheels, and having the wrong kind can damage your hubs. The threads made of a comparatively soft aluminum alloy on the hubs can be easily stripped by those on a steel freewheel.
   I’ve heard that you can actually install a British-threaded freewheel on an Italian hub, but after doing so, you will be unable to undo the process. The thread is supposedly at a different angle, and will cut into the hub threads, making them looser if you ever attempted to swap out for an Italian part in the future. Considering I am reselling this bike, I didn’t think that would be a very fair “surprise” to spring on a buyer.
   At this point I’m having some trouble trying to find a relatively inexpensive “Campy” freewheel. Not only are they prized because of their prestigious name and quality, but the six speed models are fairly rare. I’m thinking most vintage bicycle owners are simply keeping the parts on their bikes, and, although I’ve found a bunch of unused (sometimes called new old stock) freewheels, they are collectors’ items and VERY costly. So far I have been having incredible luck finding the other Campagnolo parts at prices that balance well with the money I’ve recovered by selling the Shimano parts that came with the Atala, but I’m afraid the freewheel may throw my budget all out of whack!
 
   One of the first steps of cleaning up the frame was wiping everything down with a degreaser. The previous owner had used black electrical tape to secure the wiring of the bike computer, and it left a gooey residue on the fork and frame. I used a product called Goof Off, which is very effective in removing this gunk, but I had to be careful with the chemical, which will also attack the older bicycle decals. Unfortunately this Atala pre-dates the modern vinyl cut logos that are covered in clear coat. 
   The chainrings, brake calipers, seatpost and bars cleaned up really nicely, but the chrome was in pretty sorry condition on the headset and the top of the fork. This is a usual trouble spot because of sweat dripping off the head and face of the rider. There was some pitting that just couldn’t be remedied, but I’m always surprised how a bit of light oil and some scrubbing with steel wool effectively restores chrome's shine. Check out the before (left) and after pictures below.
 
 
   On one of the nicer days last week I took the wheels outside to work on them. I cleaned up the rims and polished the hubs, which came back to a nice shine. I couldn’t restore the shine to the spokes, but I wanted to remove the light gray scale of oxidation that had formed on them. Because steel wool creates too much flaking and debris that I didn’t want to get into the hubs, I used a trick I learned a while ago to scour the spokes with some crumpled aluminum foil instead. Although the old tires still held air, they showed signs of drying out and cracking, so I put on some new Vittoria Zaffiro tires.
   It seems counter-intuitive because of the dirt and grease sometimes involved in cycling, but bikes of this style and era often had white saddles and handlebar tape. I keep thinking how a repairing a tire or dropped chain could really mess things up, but it really was a classy look, so I'm sticking with it! I installed a new Selle Italia XR saddle, but I’m going to wait until last to install the new Cinelli bar tape, so I won’t accidentally grab it with grimy fingers while finishing work on the bicycle.

I’ve actually had a couple tune-up jobs come in this week, so I’d better get back to the real "work".

Tuesday, May 7, 2013

The Man of Steel (bike frames)

   I’ve been trying to post regularly on Mondays, but after finishing schoolwork with my son Carrick, I took a long ride then went to see Iron Man 3 with him and my brother-in-law, so I've been delayed by a day. I grew up a comic book collector and seldom miss any of the Marvel movies when they come out. As a matter of fact, I was wearing a Captain America cycling jersey (photo right) when I was hit by a car in 2008. I don’t hold anything against Cap because of it – he was my favorite growing up, and always will be!

   With a couple recent repair customers and the NHL playoffs otherwise keeping my attention, I haven’t been devoting too much of my free time to my side projects. I also took a trip up to Connecticut to pick up a triathlon bike for Sue (photo below). Now that she is has made the multi-training a permanent part of her life, I figured she should have the proper equipment, instead of just some aero bars bolted onto a road bike.
 
 
   I have been watching eBay regularly for parts to complete the Atala bike project I’m tackling. This bike is one that I had considered back when I was looking to replace the heavy Motobécane cyclocross bicycle I used to have. A shop in Pottstown that sells used bikes, particularly some nice vintage machines, had a beautiful red Atala posted on craigslist, but when a fantastic Cannondale appeared at a similar price, I snapped it up.
   When searching for a triathlon bike for Sue, I noticed that the Atala was on craigslist again, at almost half the original asking price, so I went to take a look at it again. It had mostly Campagnolo parts and needed some chrome work, but the paint was really good. You can see in the picture below that it looks pretty great already, but I thought this bike needed some extra love, and I wanted to rescue it.

 
   I’m going to outfit the bike completely in Campagnolo components, and try to get rid of most of the rust. I know I have too many bicycles already, so when I’m done making everything nice and shiny again, I’d like to sell it to someone else into vintage bikes. The Atala should look really sweet, and by making it available to a wider eBay market, I should have no problem making a little profit either.
   Removing the Shimano freewheel required quite a bit of muscle, which is understandable, since the pedaling motion essentially tightens the part onto the rear hub. I always wear a heavy work glove when taking on this operation, not only because it pads my palm nicely when applying the pressure to the wrench, but also because I am uptight about protecting my hand in case something should slip. While removing a stubborn pedal crank, I once smashed my left hand into a chainring, severely cutting the knuckle of my middle finger.
   Although I’ve learned the lesson (the hard way) to never turn the wrench over the top of the chainring or cog, and to instead turn towards the bottom where the hand would slip away from the dangerous teeth, it never hurts to be careful! The added security makes me feel less apprehensive about really putting full power onto the wrench.
   The next step was to remove the mismatched Shimano shift levers and rear derailleur. The bike also had a saddle manufactured by another Italian bicycle company, Bottecchia – definitely the wrong! I have been listing all the parts (photos below) on eBay to defer some of the costs of the Campagnolo components, which I anticipate being a bit more expensive.
 

I’ll report on progress with the shop sign next week, along with any further developments with the bike.