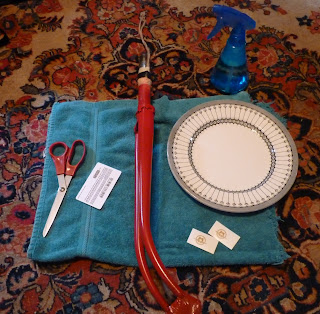
The Motobécane repaint project is nearing completion, if only the weather would cooperate. One day it's too hot, one day it's too humid, and today it just rained constantly! Yesterday I was able to finish the fork and stripped off the masking, but I ran into a minor problem with the frame. I rushed things a bit, and ended up with a run in the clear coat. Nothing major - when it dried, I lightly sanded it smooth. Now I just have to go over that spot again very patiently, which is hard to do when the last few steps are so close.
No, I'm not going to intimidate you with all this bicycle geometry stuff - just trying to shake you up a bit! However, I thought great diversion from the project would be a discussion about bike fit, that is, the way for you to find the position which will provide the safest and most efficient pedaling motion. I will first address each adjustment and then explain the method to find your correct position for each.
Seat Angle
Adjustment: You should initially start with the seat parallel with the ground. If you experience discomfort, tilt the seat angle up or down a maximum of about 3 degrees.
Method: On most bikes a bolt is located near the top of the seat post that loosens, allowing you to adjust the seat.
Seat Height
Adjustment: Put on your cycling clothing and place the bike on an indoor trainer or position yourself on your bike in a doorway to hold yourself up while pedaling. Have someone sit behind you to observe. Raise the seat until, as you pedal backwards with your heels on the pedals, your legs are completely extended at the bottom of the pedal stroke. If your hips rock side to side in order to reach the pedals, the seat is too high.
Method: The bolt that holds the seat post in place is on the side of the frame by the base of the post. Pedal backward until one pedal is at the bottom of the pedal stroke. Your heel should just be able to touch the lower pedal with your leg straight so that when you place the ball of the foot on the pedal, your knee will bend.
Pedal/Shoe Adjustments
Adjustment: A cleat or toe clip is important to ensure that your foot stays in its most efficient pedaling position, with the ball of you foot over the axle of the pedal.
Method: Traditional toe clips, which include cages and straps, can be attached to pedals to hold feet in the correct position. Although clipless pedal systems may take some practice, you will find them much easier to get in and out of than toe clips. The position of the cleat on the sole of the shoe can be adjusted to make sure that when you click into the pedal, the ball of your foot is centered over the pedal.
Seat Fore/Aft Position
Adjustment: While on the bike and with one pedal located at three o’clock position, have an assistant level the crank arm and the pedal. Maintain that position while your helper holds a plumb line against the indentation just beneath the bone that’s below your kneecap. Adjust the seat forward or back on the rails until the plumb line bisects the pedal axle, making sure your knee is not in front of the center of the pedal.
Method: Loosen the same bolt used to adjust the seat angle.
Reach to the Handlebars
Adjustment: You are really looking for the most comfortable spot in which to reach the various handlebar positions on your bike without locking your elbows, straining your neck, hurting your back or having to shift forward or back on the seat. Pay attention to your position when riding, or video yourself to see how you look. While seated, look down and note where the handlebar is in relation to the front hub (wheel axle). On road bikes with drop bars, the reach is usually correct when the bar hides the hub. On mountain bikes the correct spot usually places the bars about an inch ahead of the hub.
Method: Unfortunately changing the reach requires installing a longer or shorter stem, which holds the handlebars in place, allowing you to steer.
Handlebar Height
Adjustment: Again, comfort is the goal. Lower back, neck, arm and/or hand pain would be evidence of leaning too far forward. Conversely, if all your weight is on the seat and you feel every bump and shock in your rear end, you’re sitting too upright. Hold a yardstick on the seat so that the yardstick extends over the bars. On road bikes the handlebar height varies from level to about four inches lower, an extreme racing position. Mountain bikes have handlebar height ranging from an inch or so above the seat to three inches below.
Method: Your bars may be raised or lower by adding or removing spacers, if there are bolts on the side or back of your stem. You may have to purchase a taller stem, or on a mountain bike, taller bars may do the trick. If your stem has a bolt on top, loosen the stem by turning this bolt counterclockwise and then striking the bolt with a block of wood to knock free the wedge that holds it in place. Raise or lower the stem to the desired location and refasten it, but be sure not to exceed the safety height marked on the stem.
Part two of “The Bike Fit Story” will include troubleshooting and some other tips.


